The “Why?”
Robot vacuums are neat! Mine helps a lot with cat hair and managing allergies throughout the year. Having said that, these devices aren’t exactly privacy respecting out of the box. From the looks of it, this is yet another market full of cloud connected designs, that doesn’t offer a cloud free mode of operation.
Since there’s no cloud free alternatives at the moment, the next best option is to choose a hackable device and perform post-market modifications. Granted, a robot vacuum isn’t a must-have appliance in a household, like a washing machine is (to me). Not purchasing one in the first place is a perfectly valid option. However, it makes my life that much easier, so I opted to have one, on some conditions regarding data privacy.
The “How?”
Disclaimer
This post is geared towards the exact unit I’m working on. Your results may vary, and following the same guides might lead to different results on a newer unit of the same make and model, potentially permanently bricking your device. It is known, that newer devices can have a different design (under the same name), making previously known hacks obsolete. Proceed at your own discretion.
Resources
These have been immensely helpful:
- iFixit mechanical teardown guide;
- This robotinfo.dev page – basically a reverse engineering summary for this model circa 2022;
- DustBuilder – provides the device-specific toolkit for rooting via FEL;
- The Valetudo Roborock guide – This will guide your through the FEL rooting process.
Notes
Mechanical
- There are many different screw types and lengths. Get around 8 small trays to keep track of them throughout the disassembly. If you’re following the iFixit guide linked above, I recommend labeling the trays with step numbers (e.g. sticky notes);
- Generally force is not needed here. There are some snap joints that need lifting with a flathead scredriver or some better suited pry tool, but you shouldn’t need to wrestle with this device.
- I think there are non-metal threads inside, so be gentle when assembling it back together.
Electrical
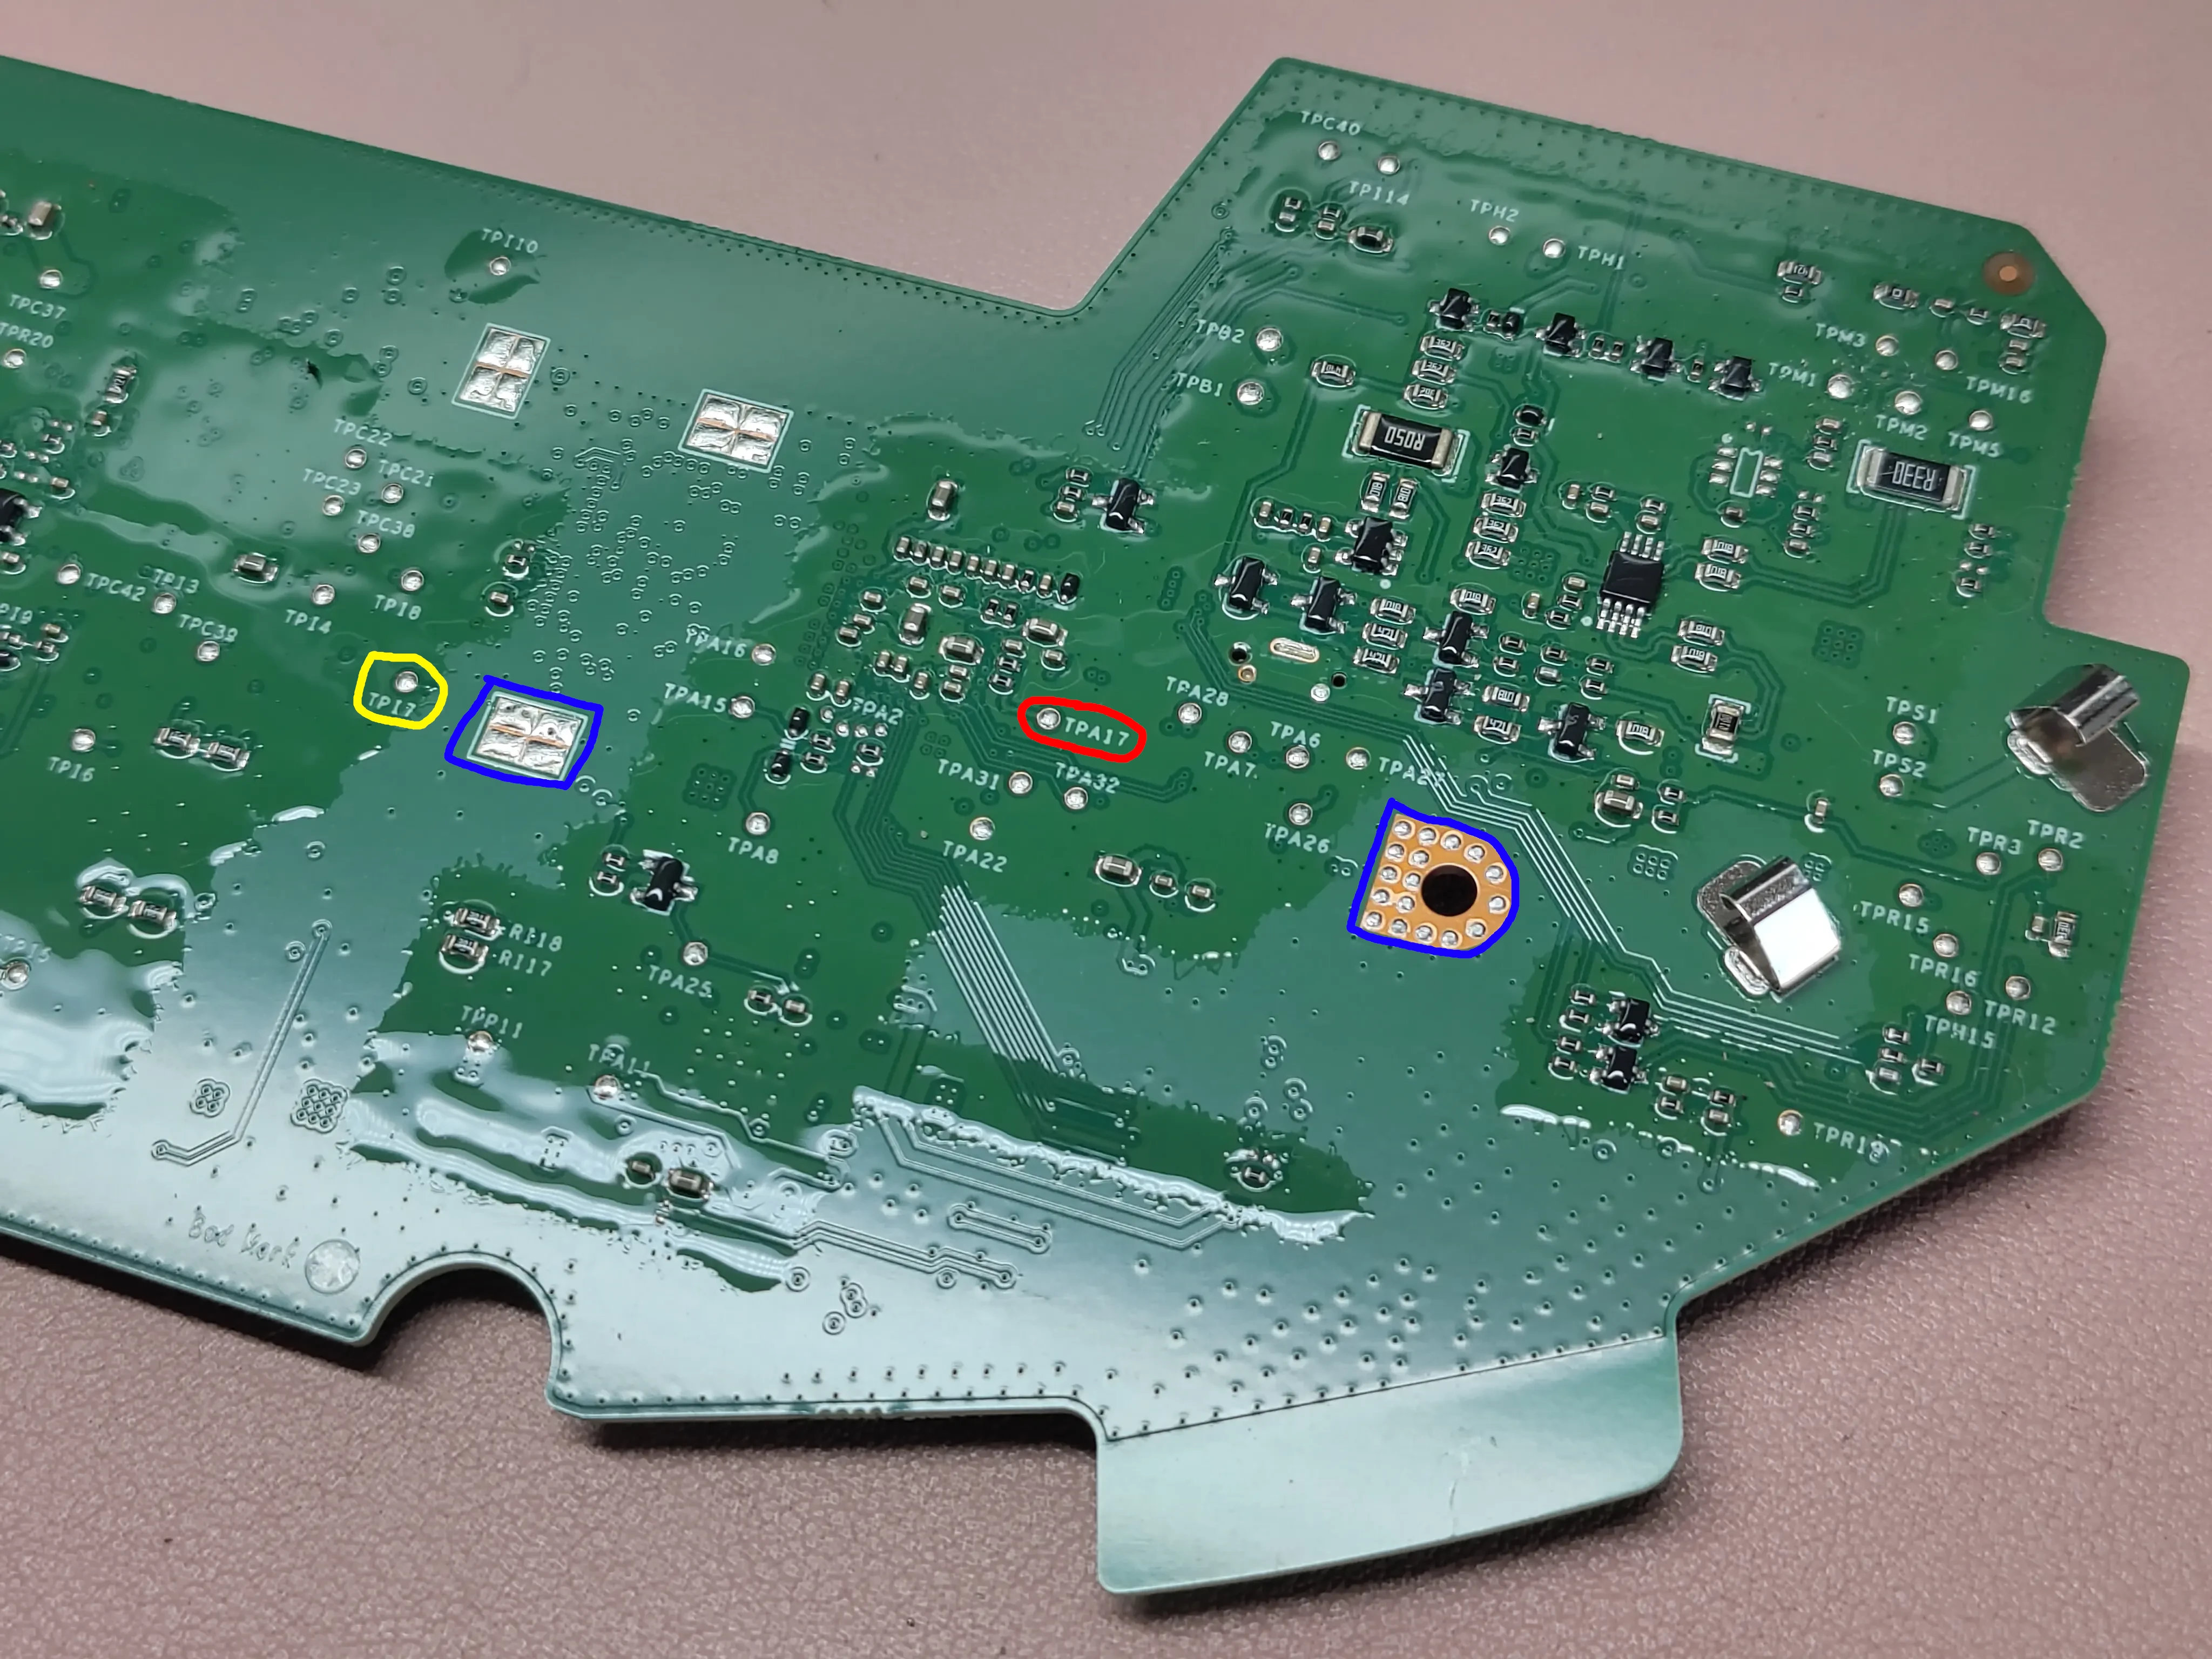
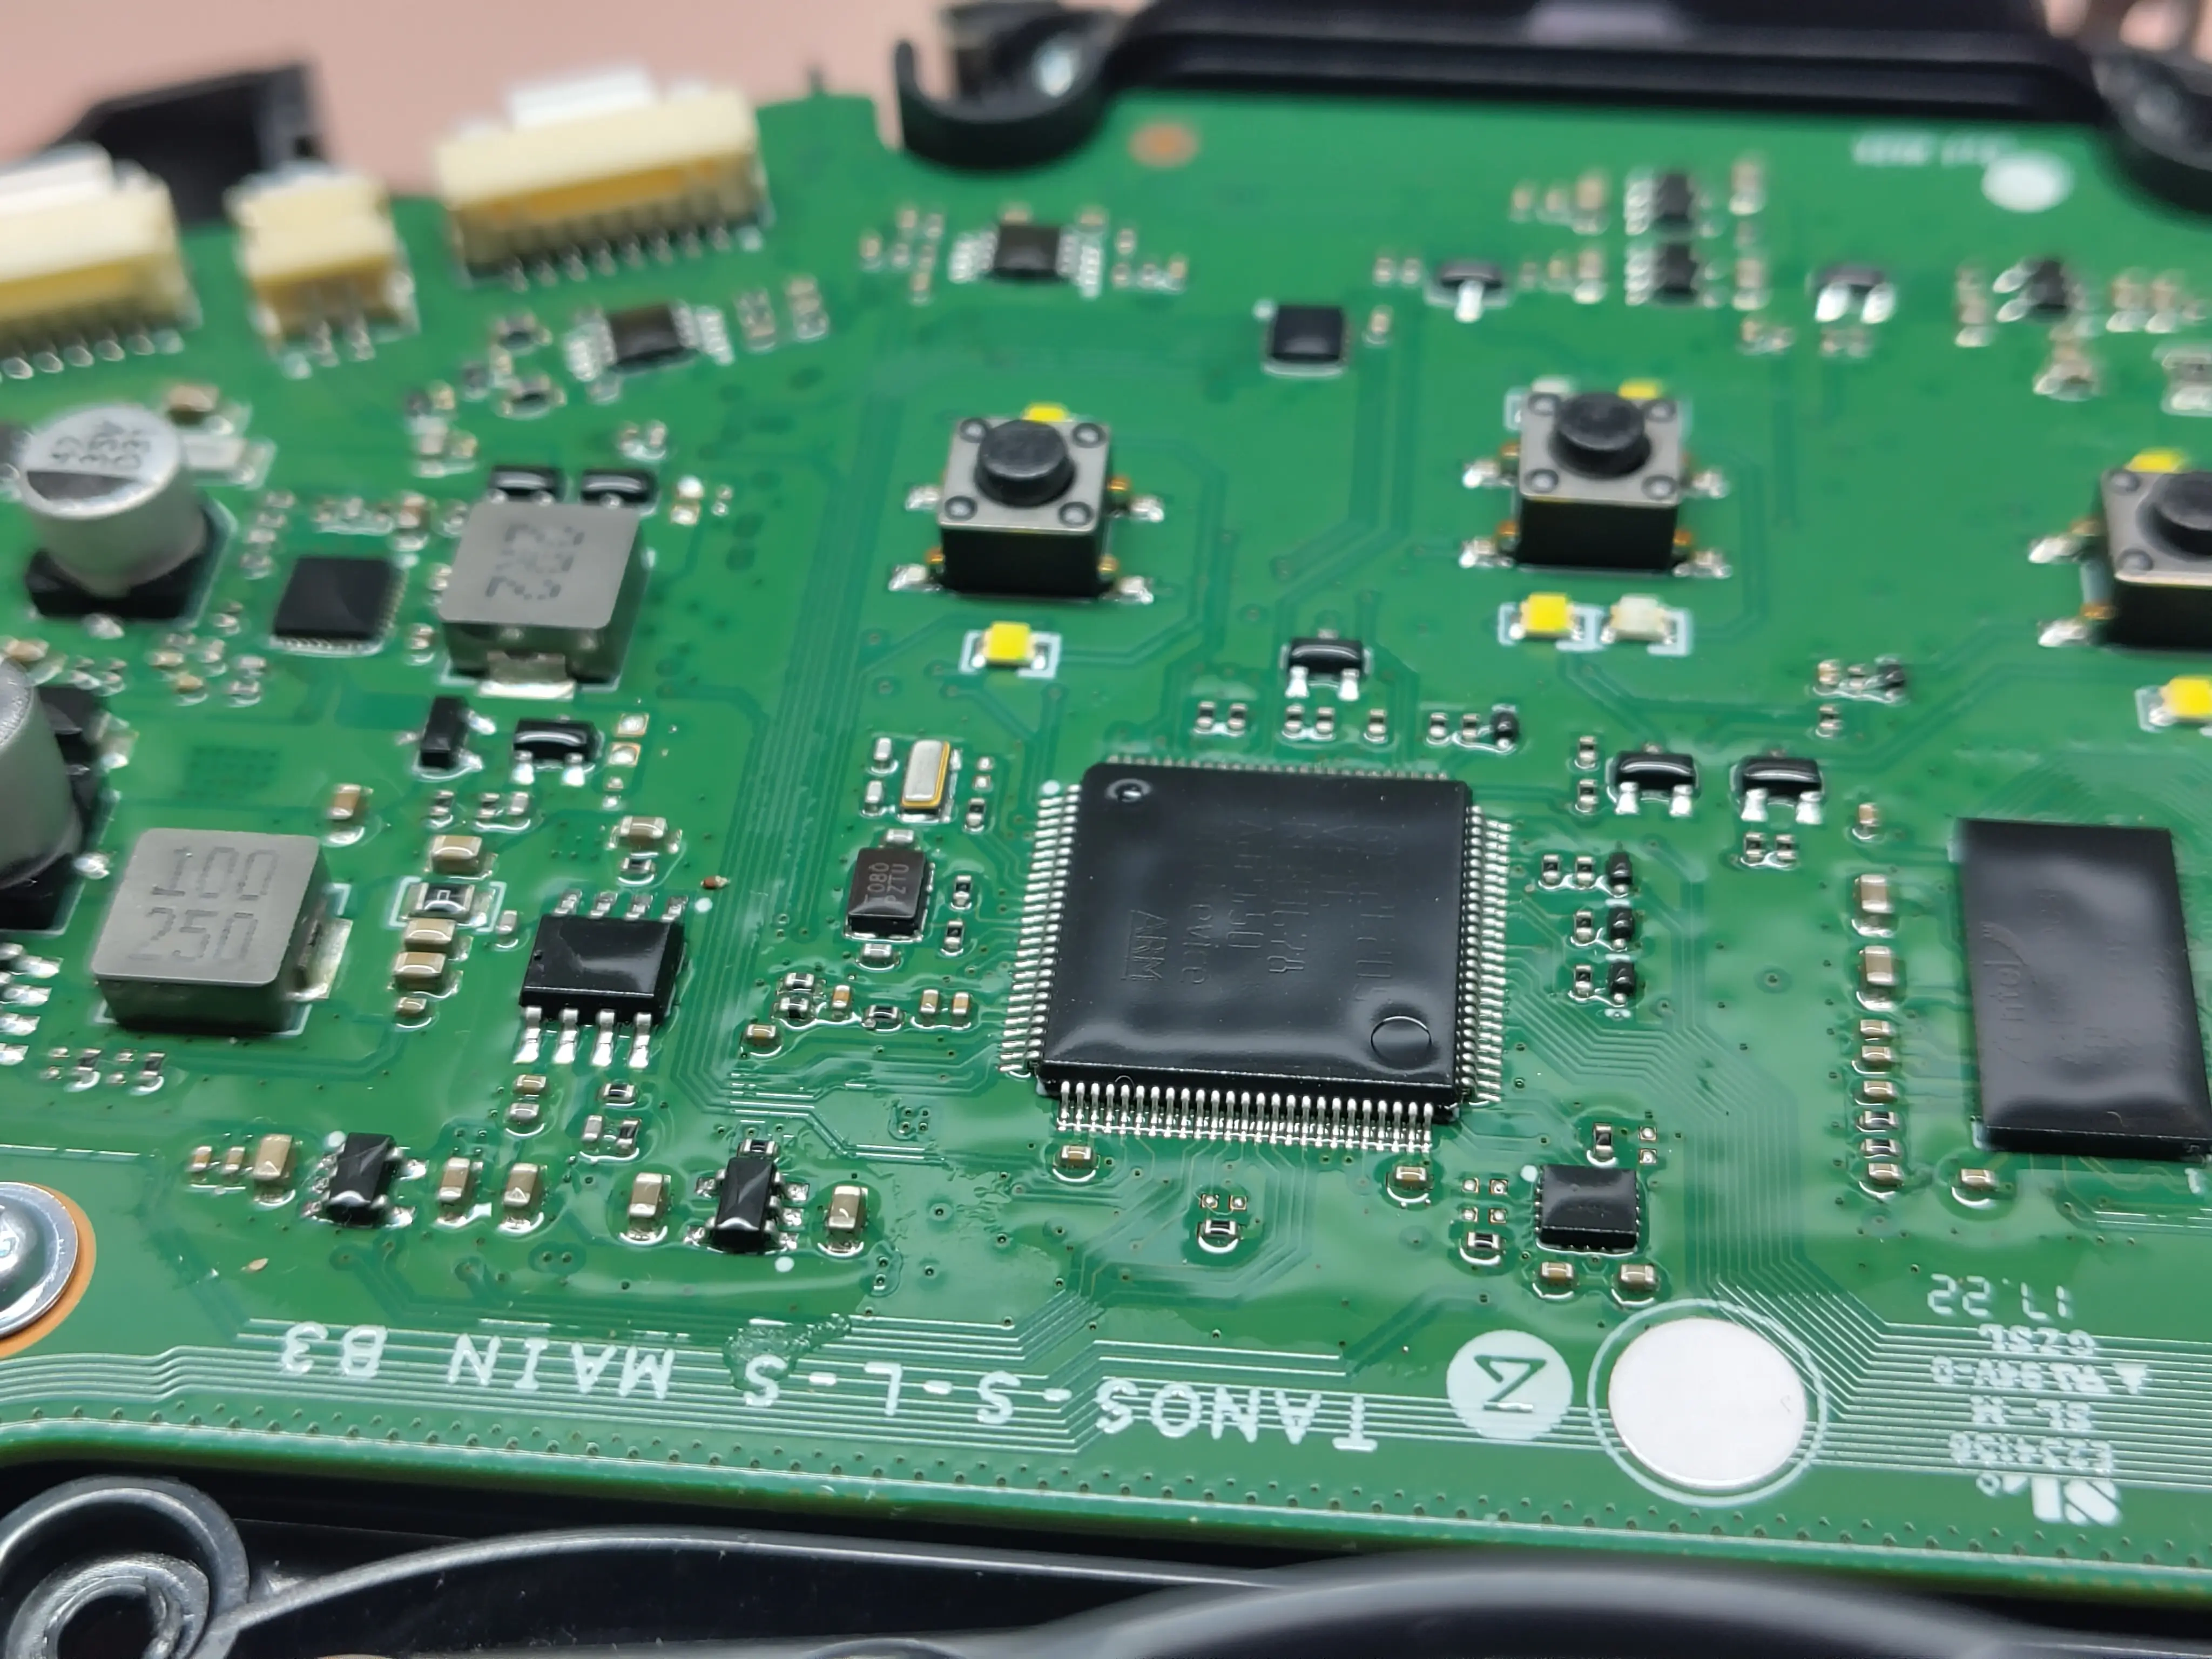
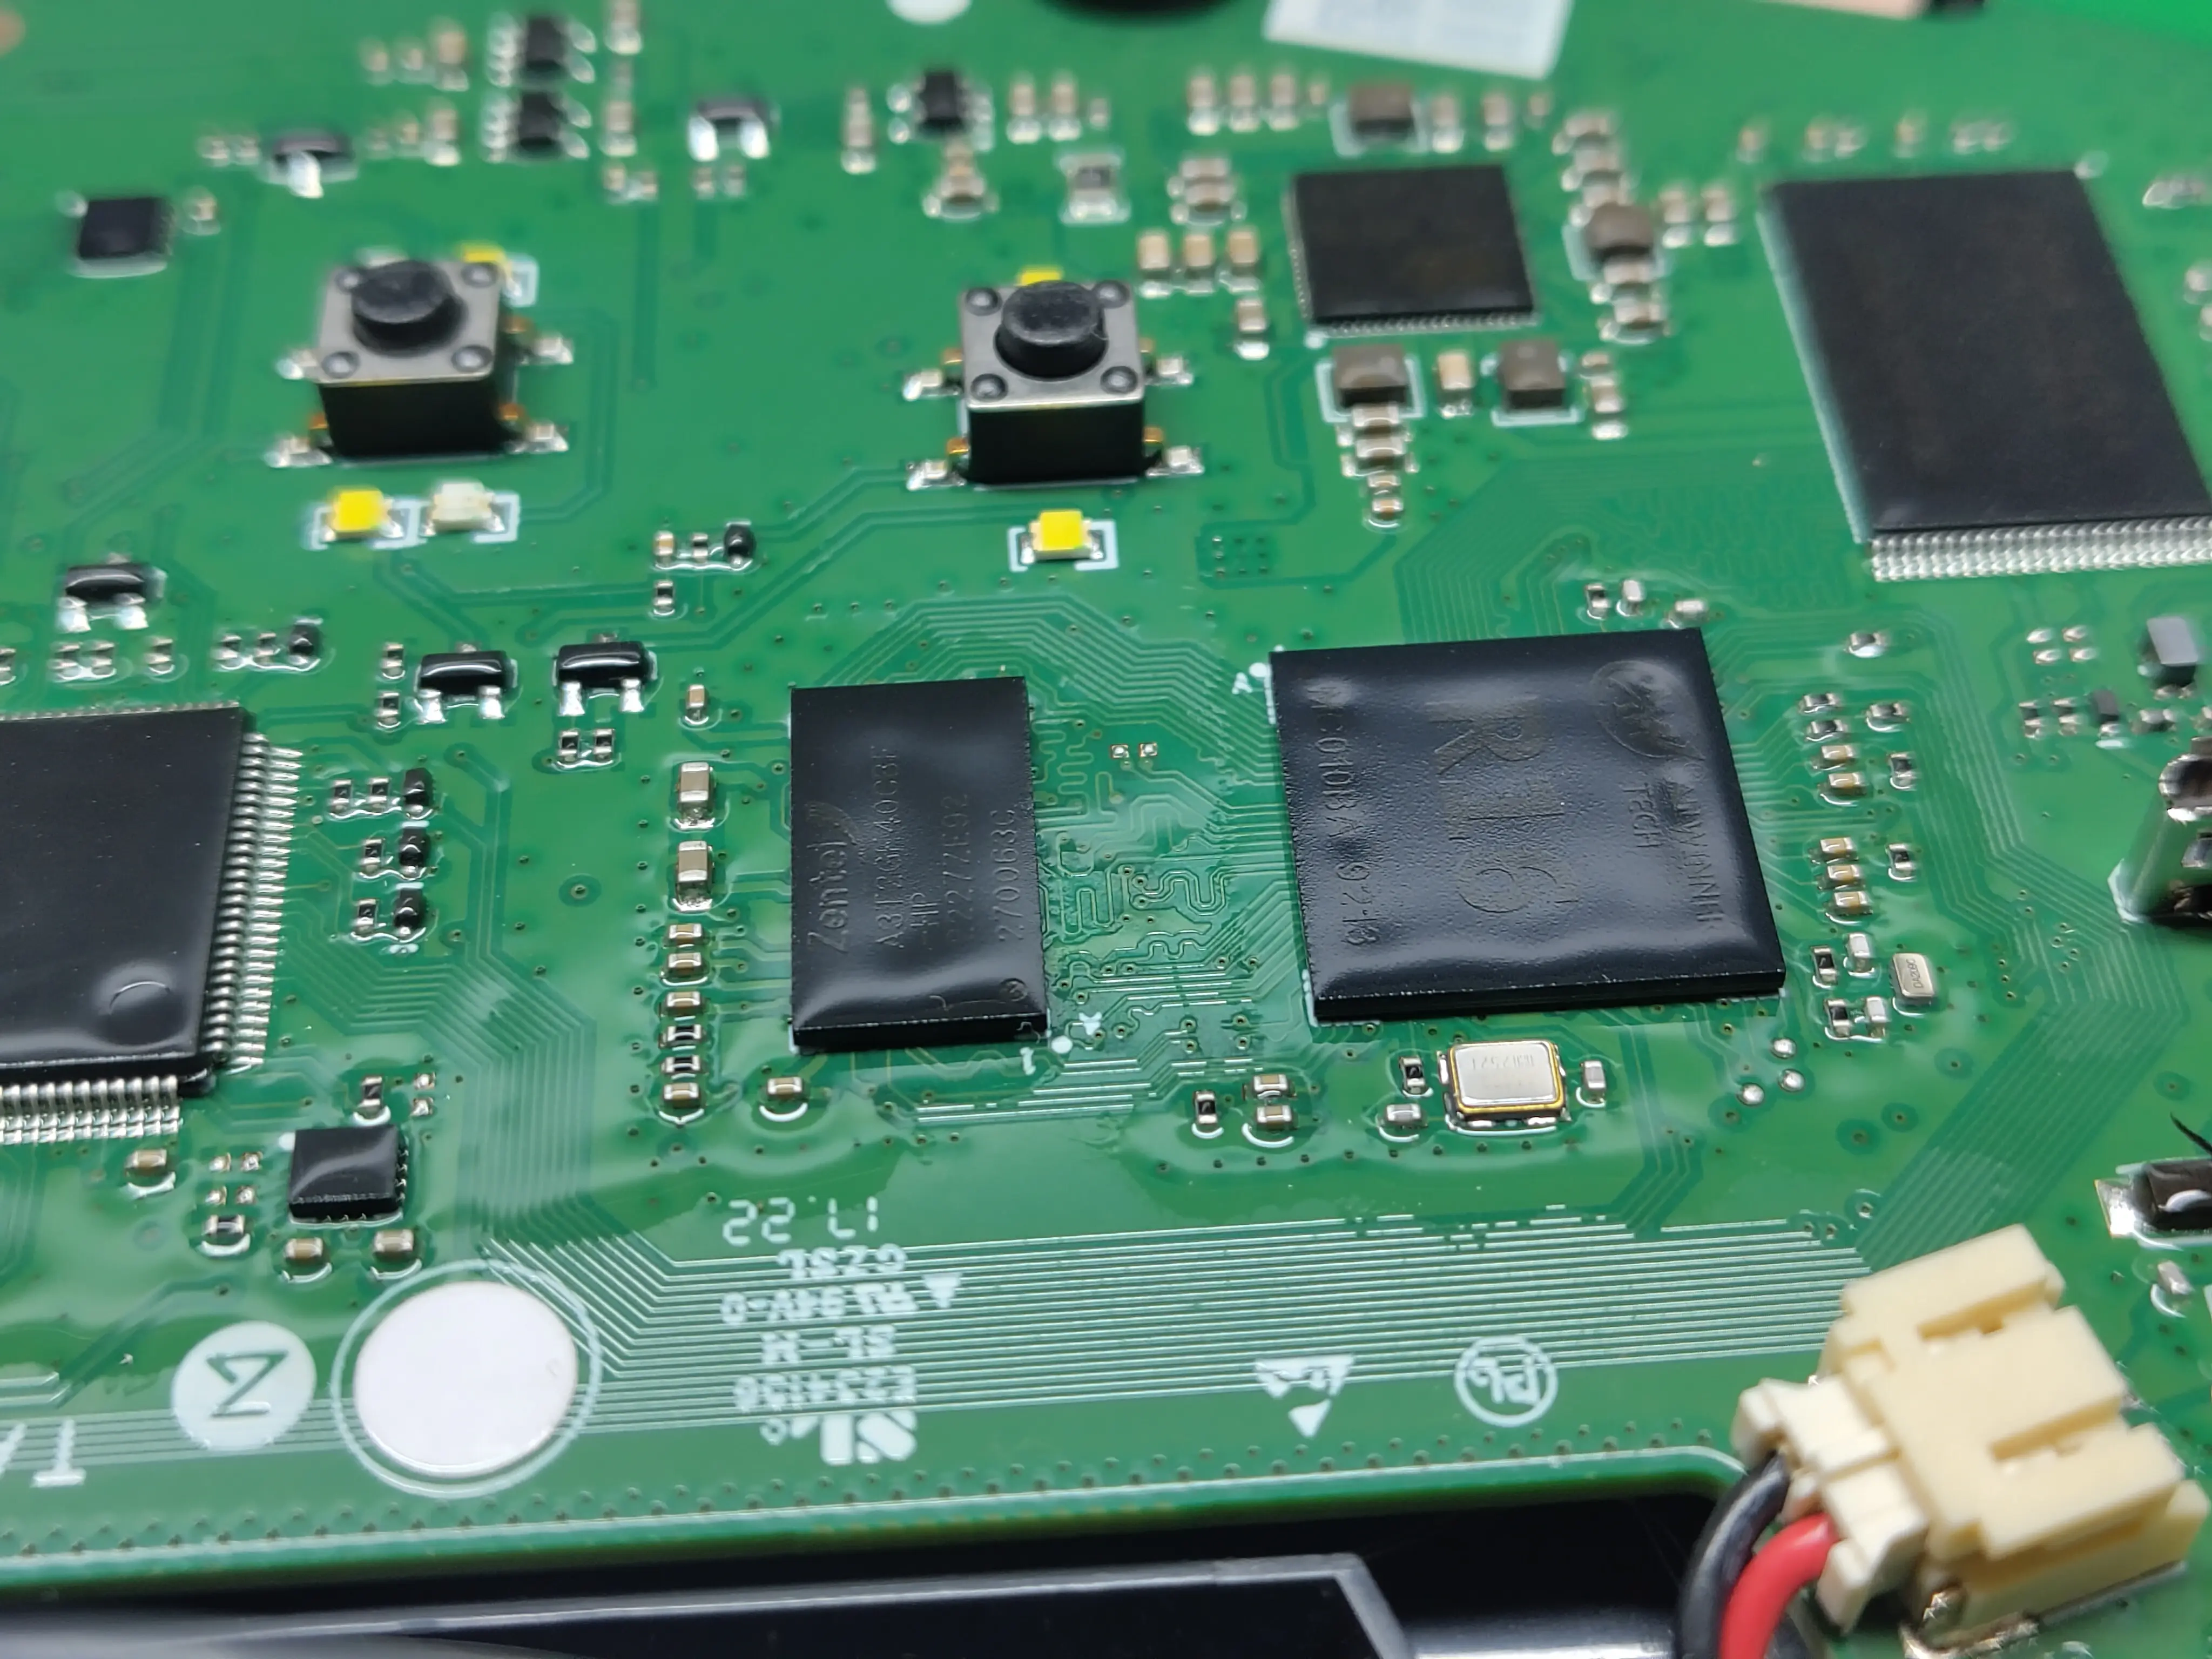
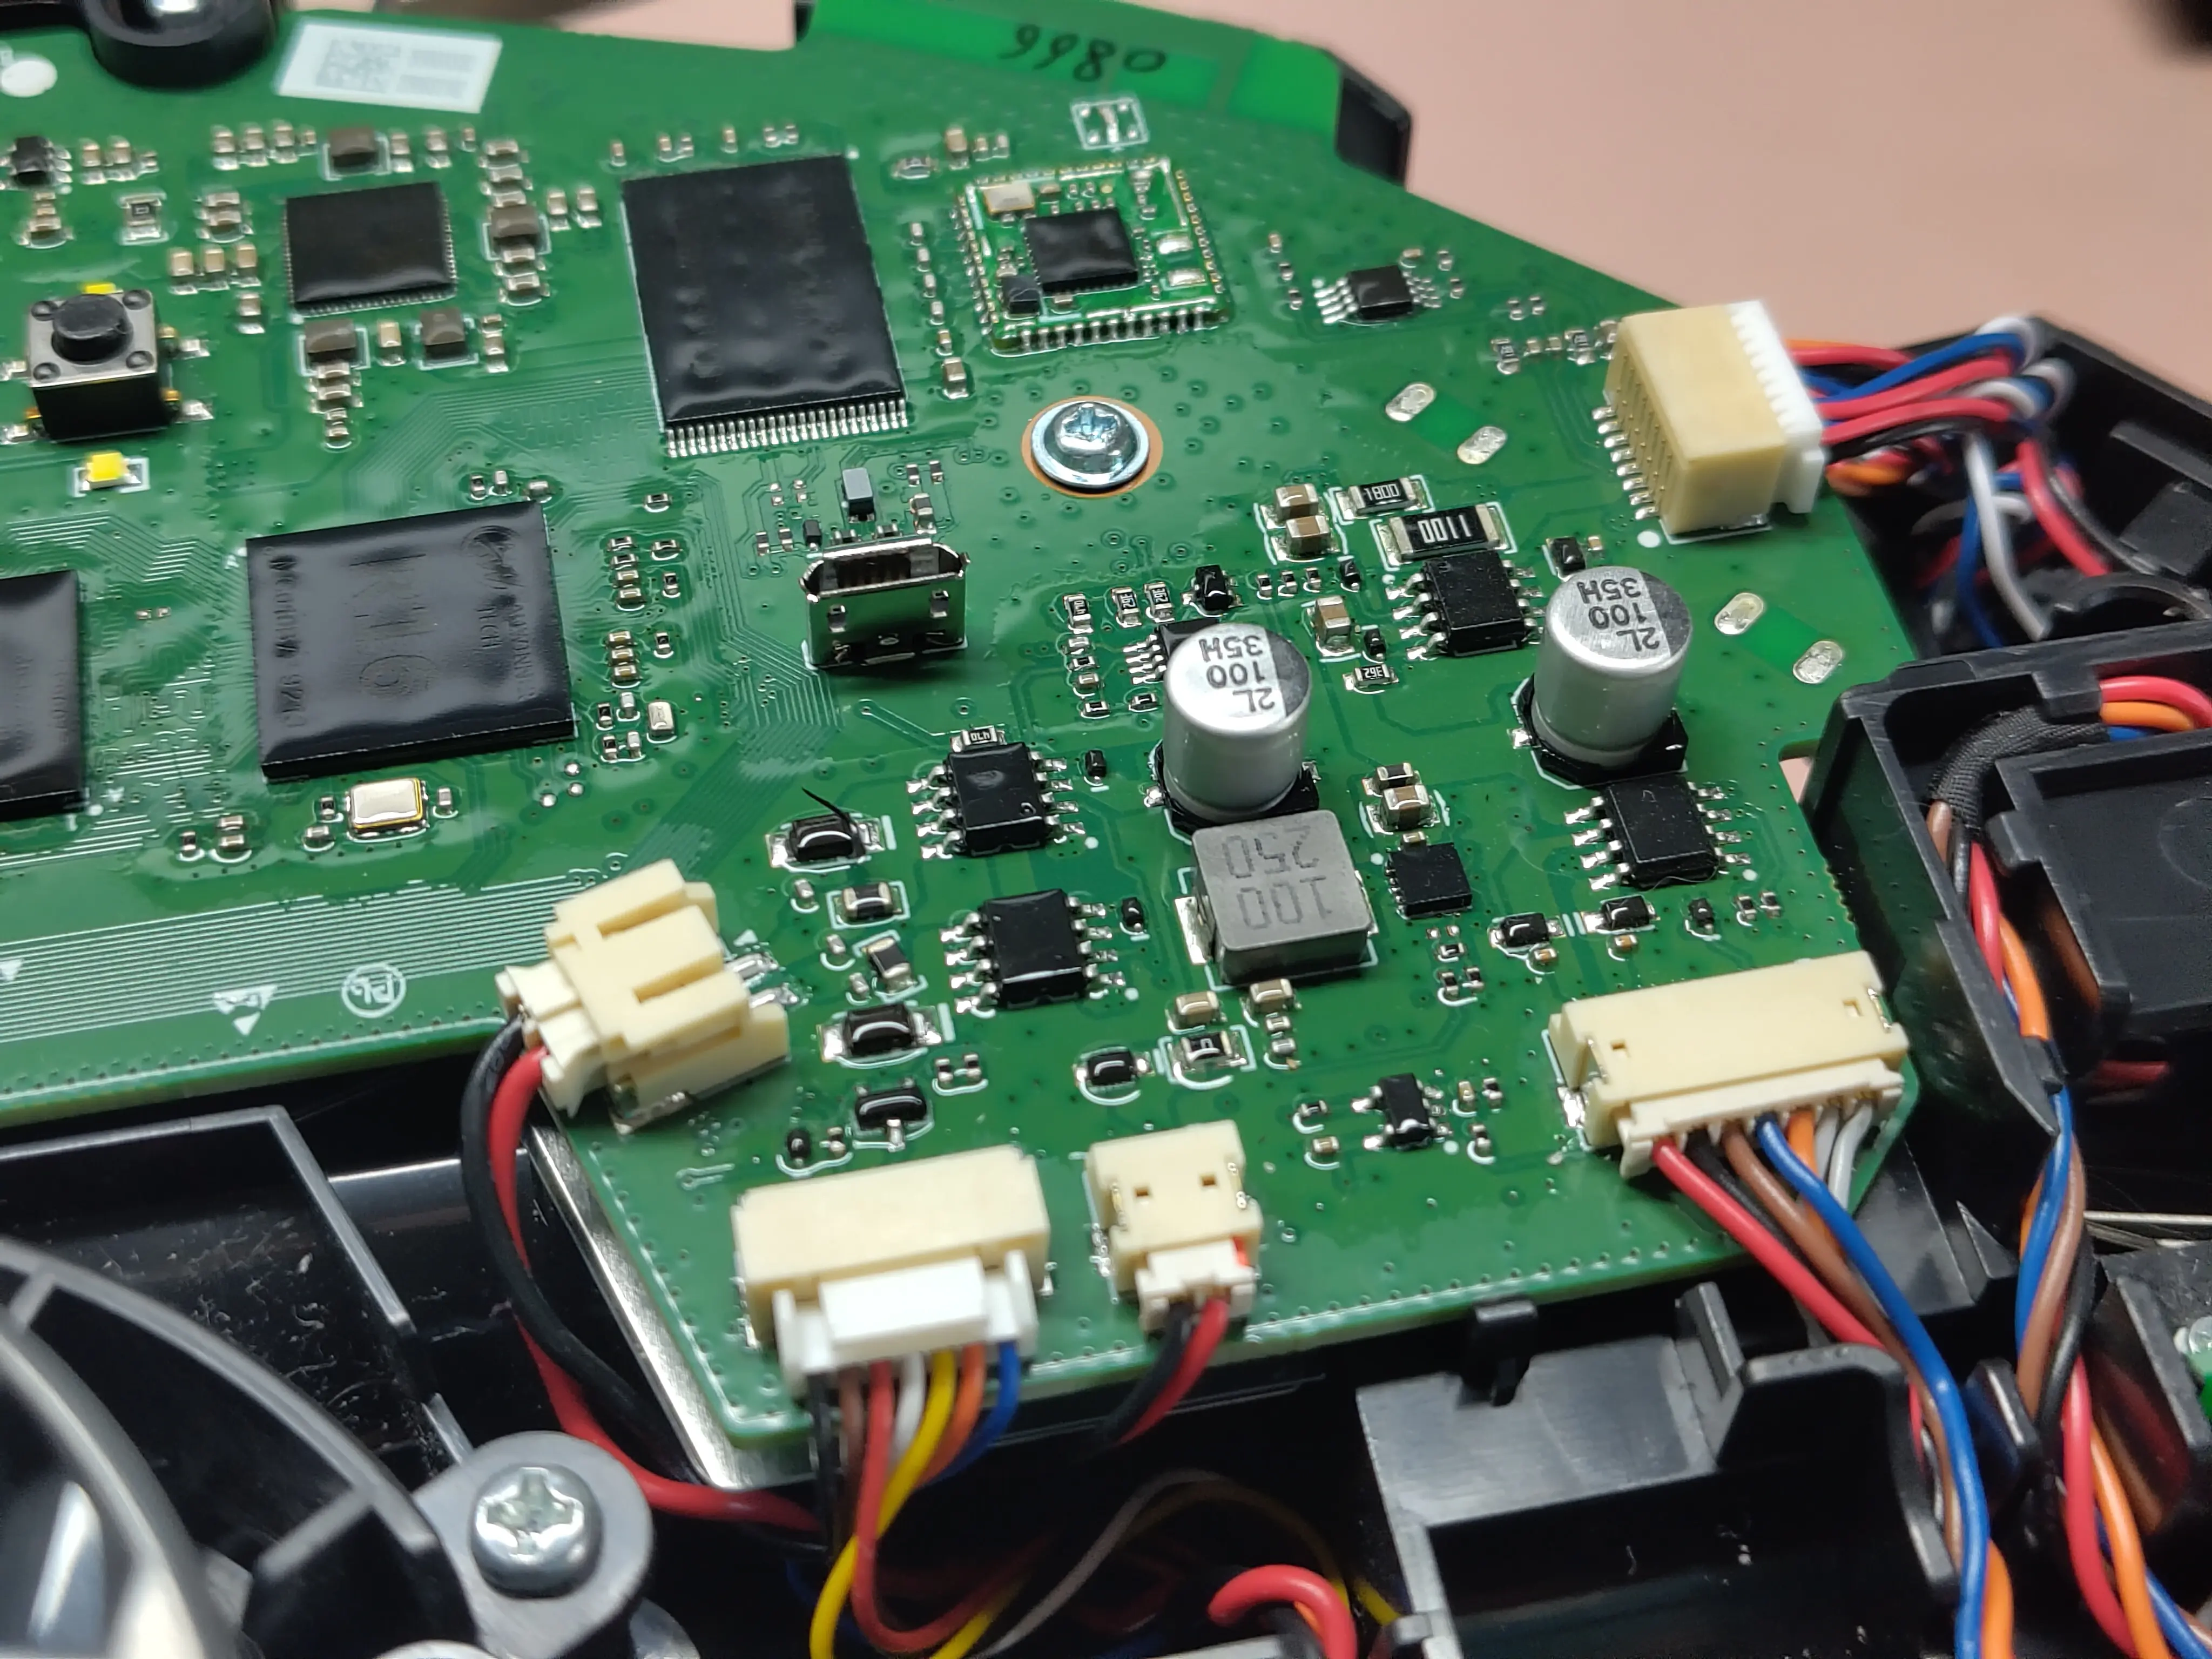
- As one might expect, screw joints on the PCB are connected to common ground, just like the pad next to
TP17(both marked blue). - Apart from
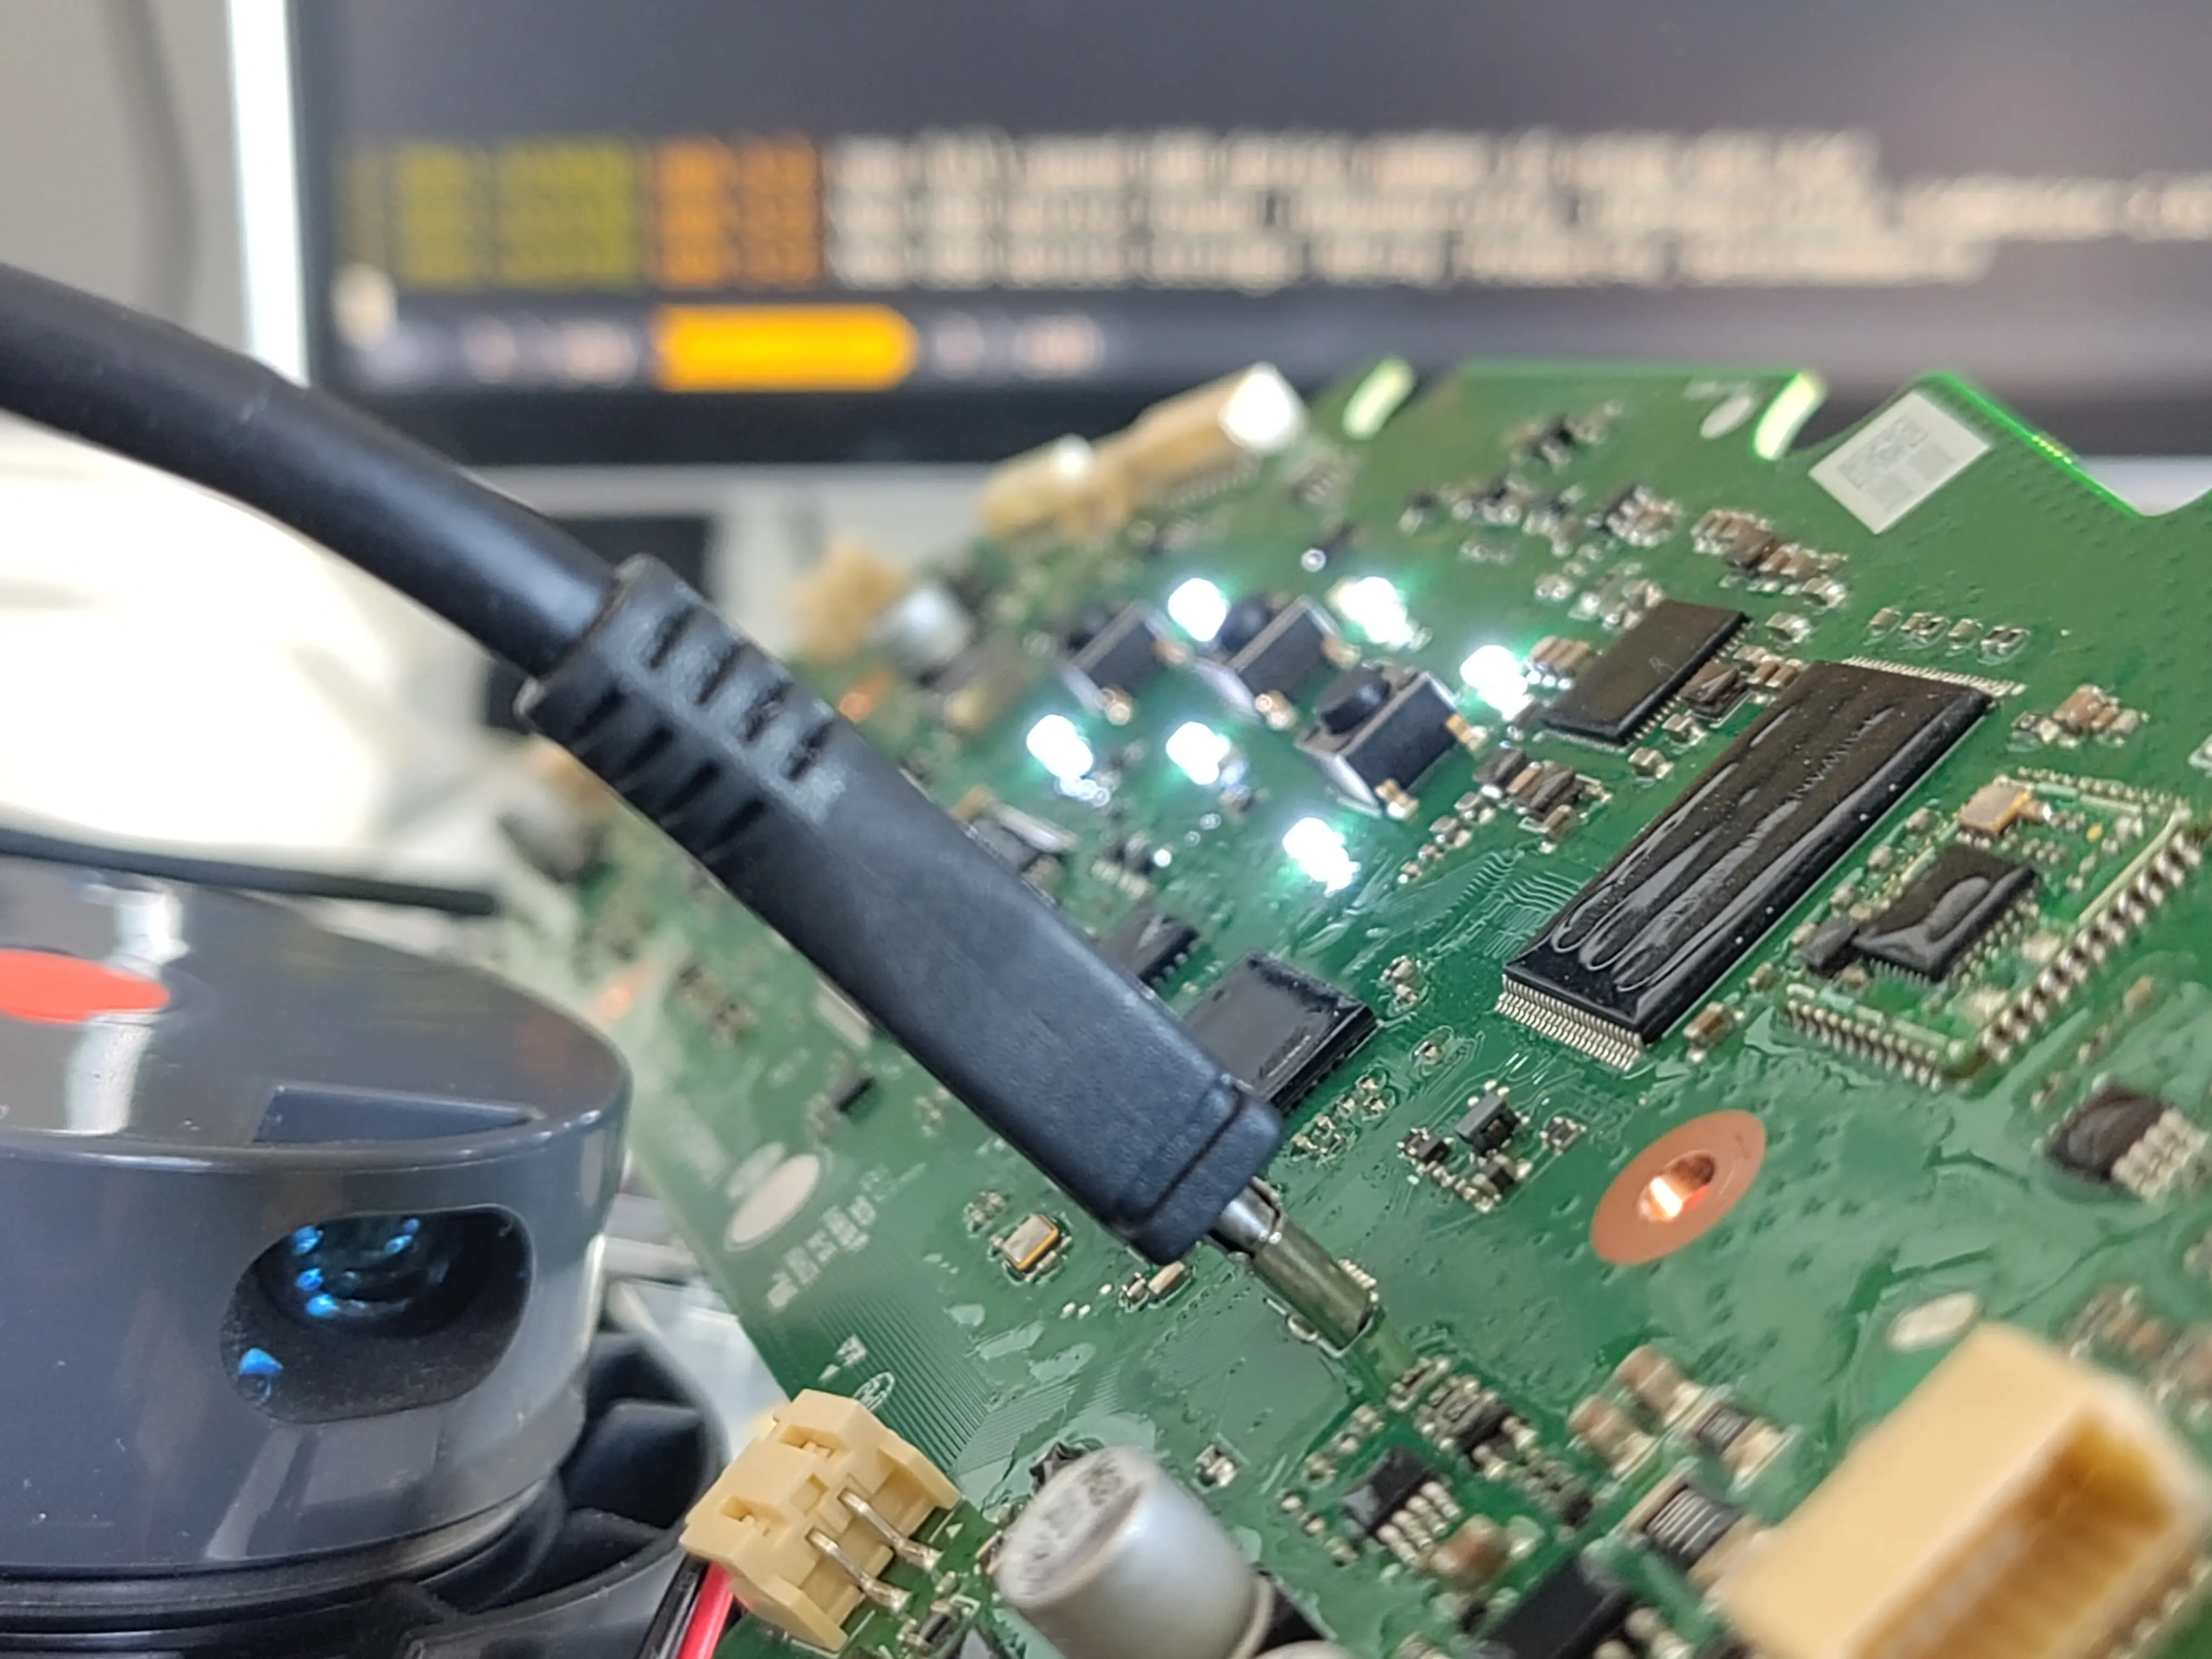
TPA17(marked red), there’s also aTP17(marked yellow) test point (marked yellow), don’t confuse them. - The board is coated with a conformal coating, to protect it from moisture and liquid damage. You’ll need to gently scrape it off to make contact with the test point. A pointy multimeter probe will do just fine.
- The battery needs to be connected for the logic to boot, turns out it’s not powered through the host USB connection! I believe the latter is mostly (or only) for UART.
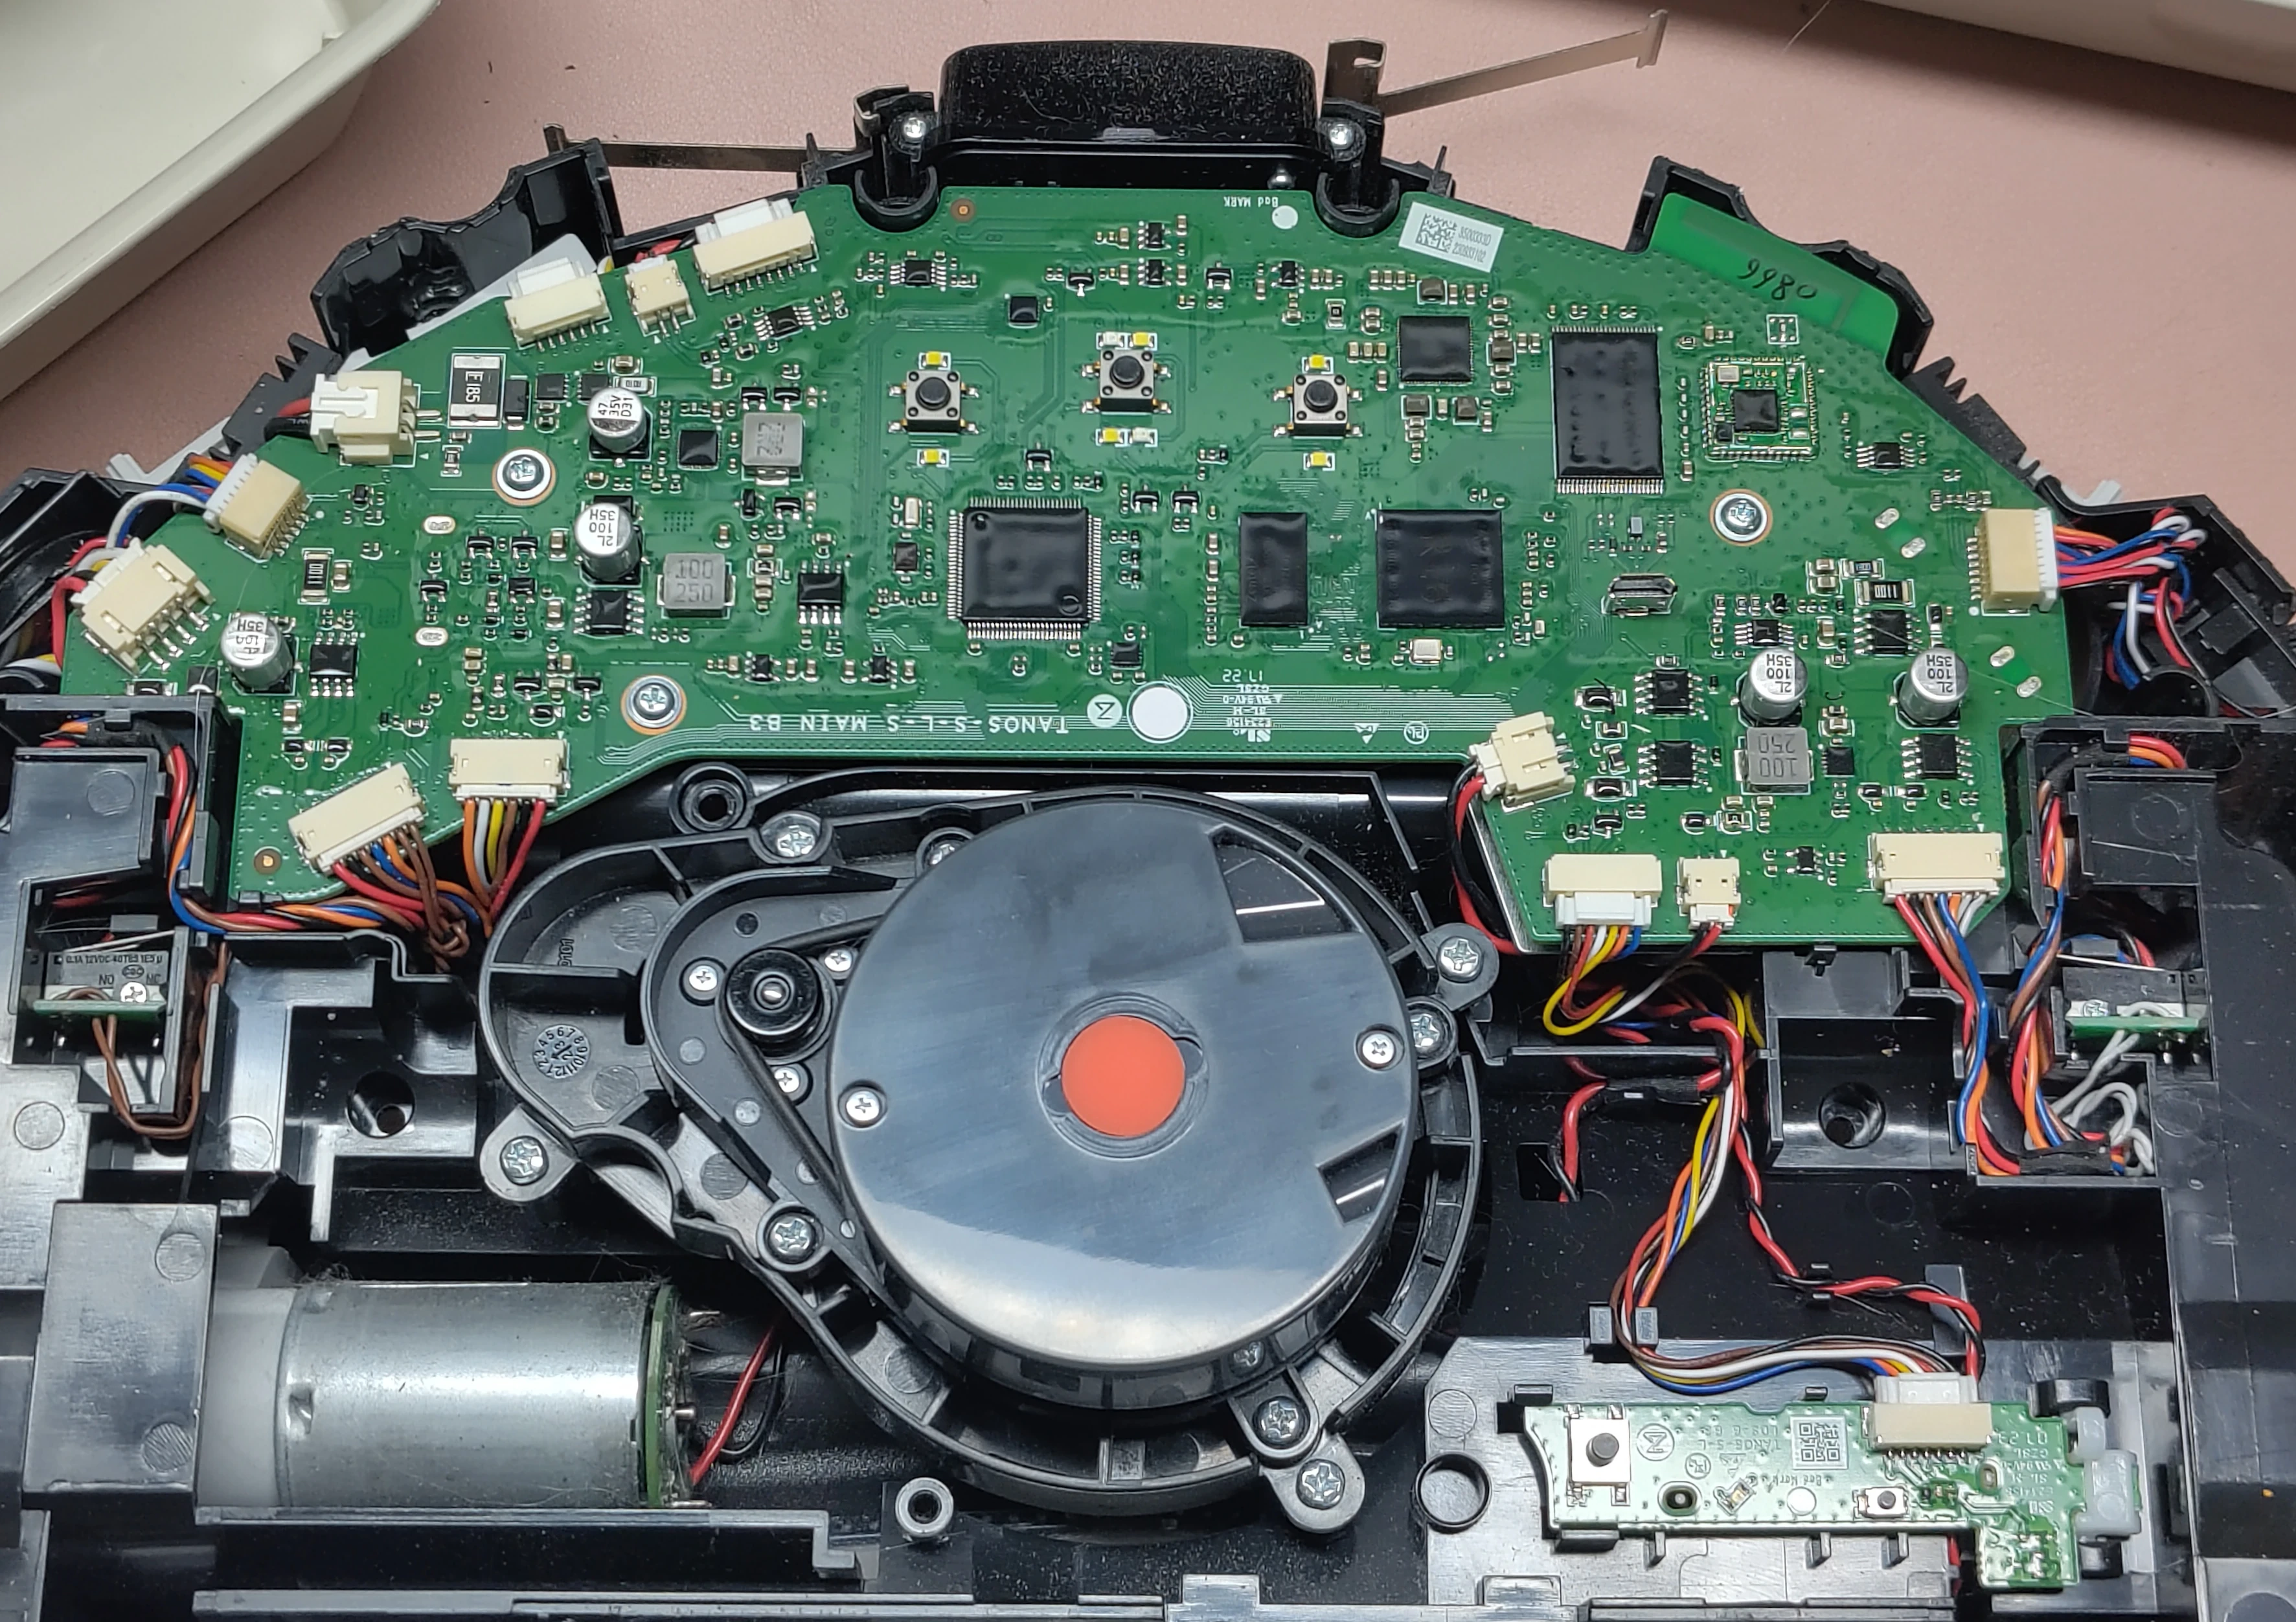
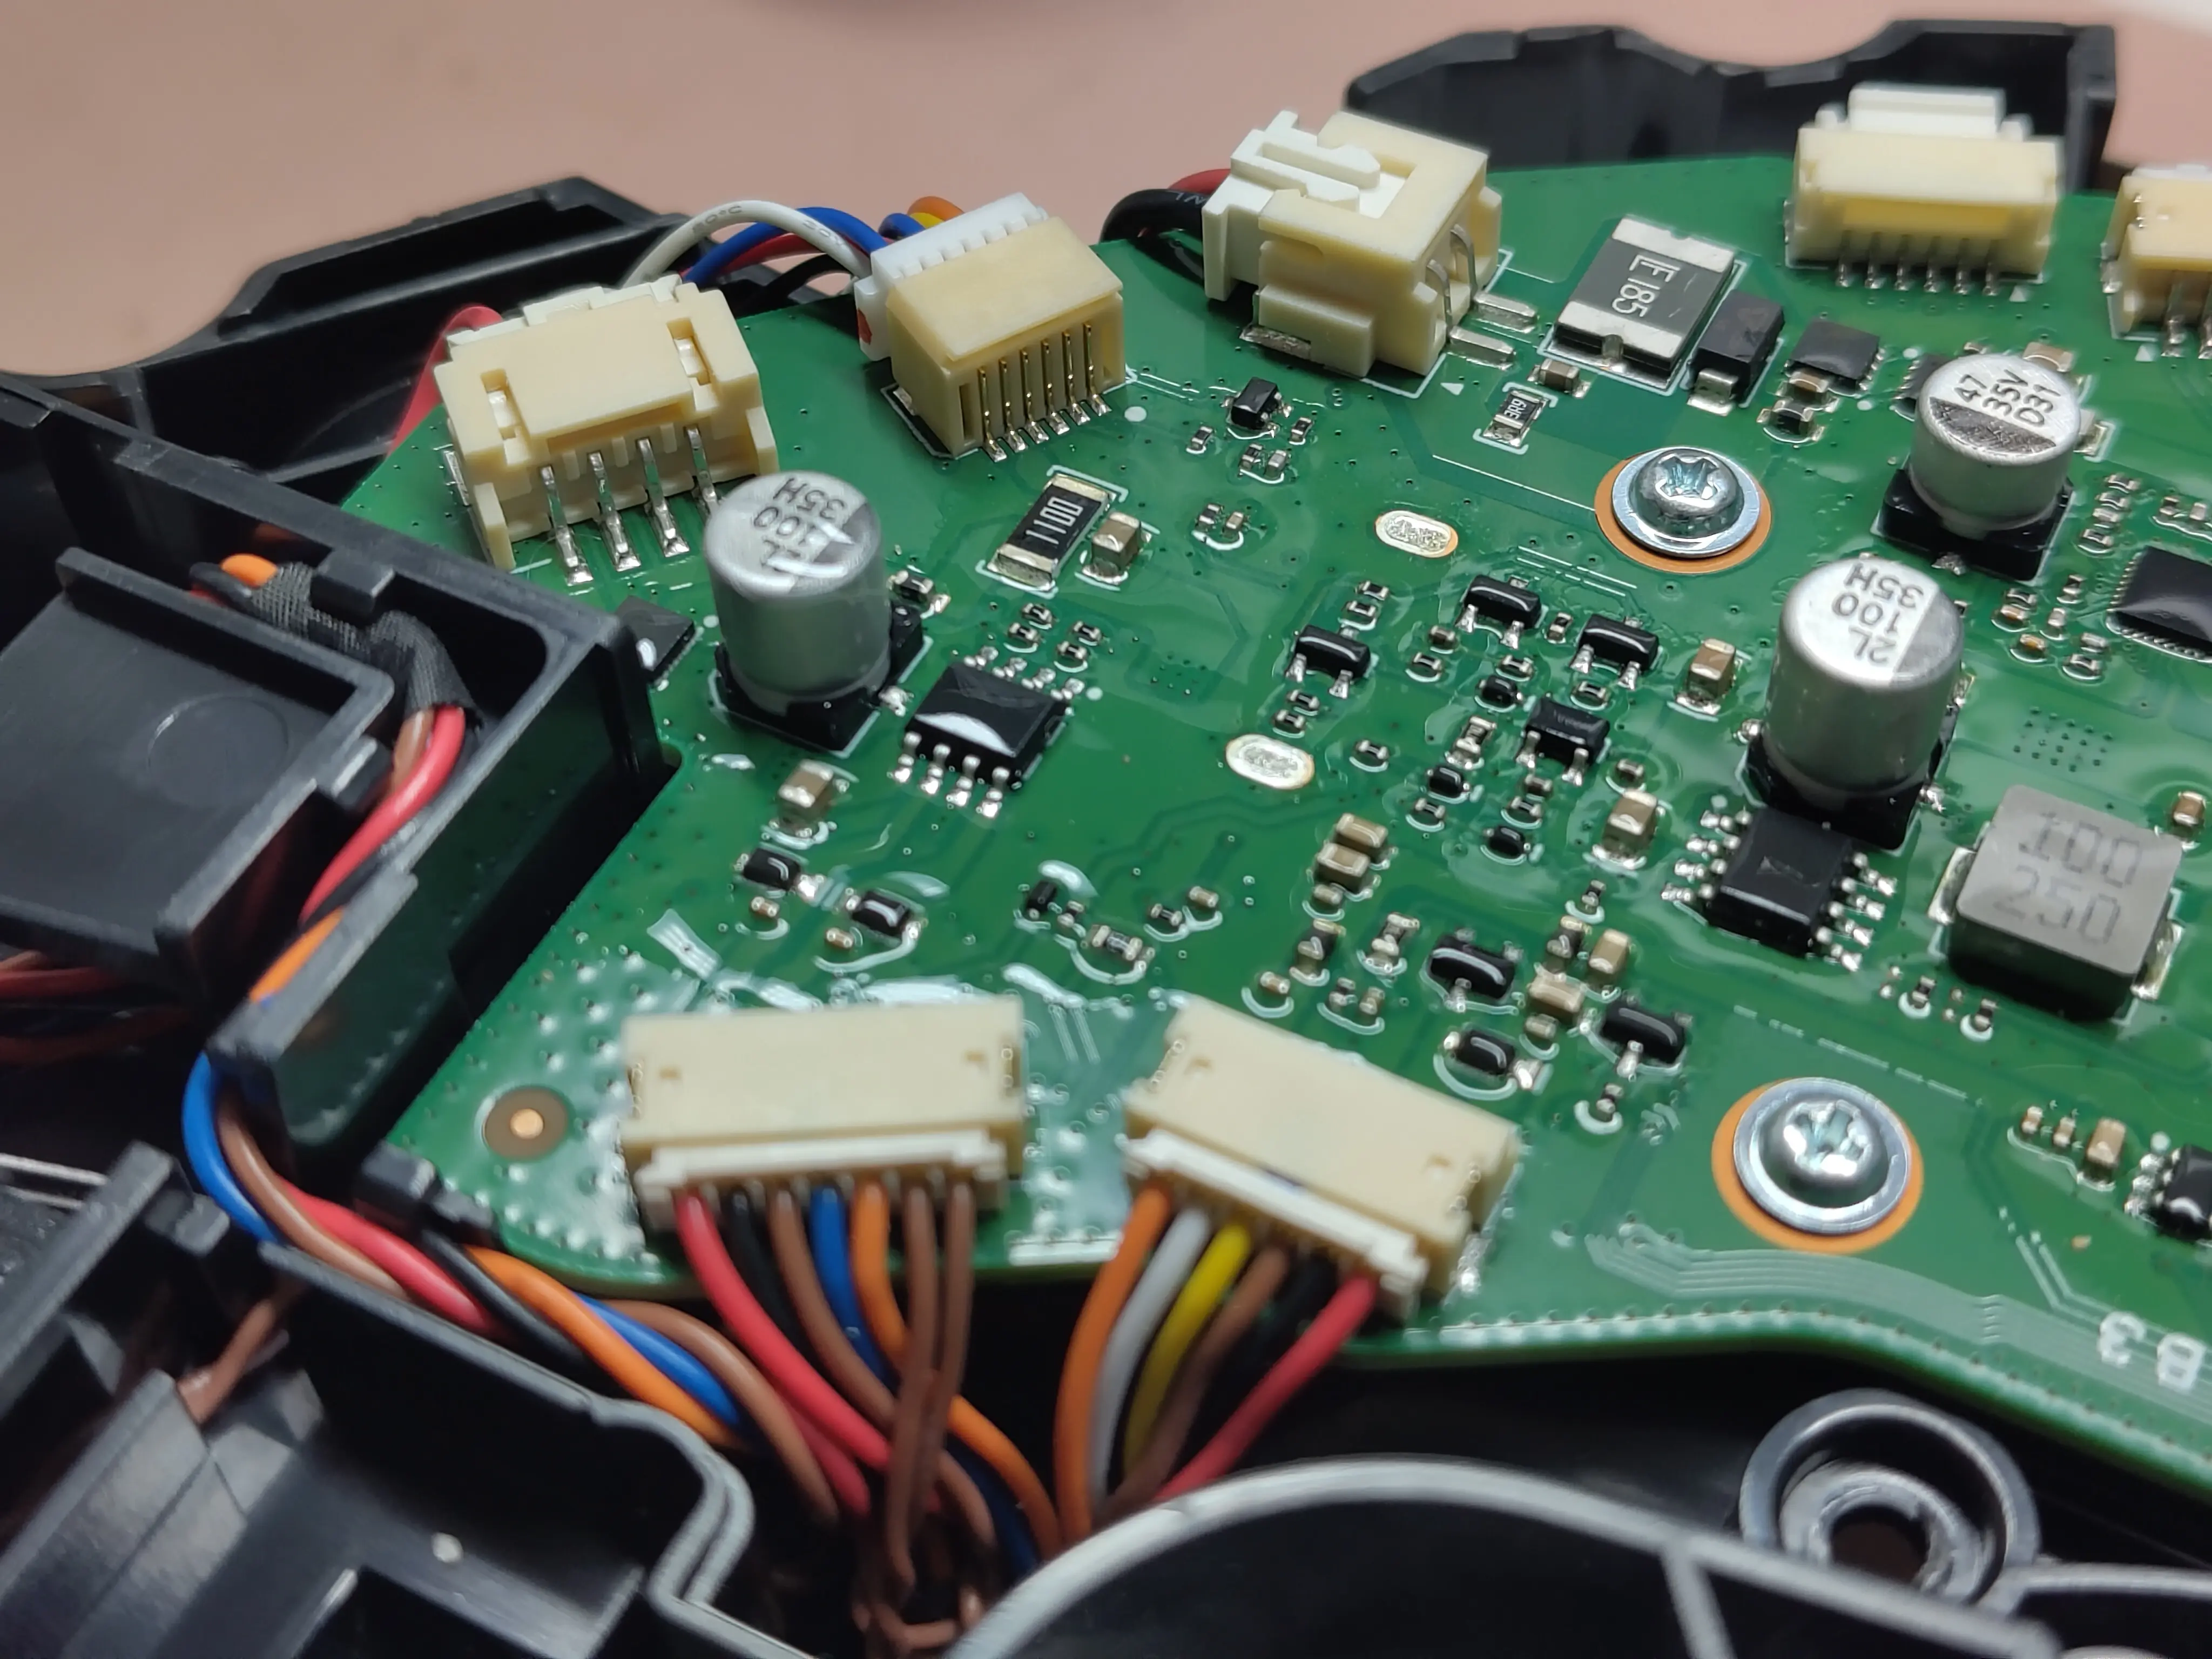
Here are some more pictures of the board to help you identify it:
Rooting issues
The sunxi-tools toolchain is needed to flash the NAND, however I haven’t had luck establishing a stable connection on Arch Linux (btw). dmesg logged the FEL-booted device being detected, but the sunxi-fel calls failed with no connection.
[
[
[
|
#...
I guessed this might work better on some Debian-based distro, as external hardware generally does. Spun up an Ubuntu VM, passed one USB port through, installed the dependencies, booted in FEL mode, started the flashing process, and it just worked!
[
[
[
[
[
[
)
The rest of the process is done wirelessly, through SSH. If the robot was previously connected to a network, you might need to reset that configuration by holding the left and right buttons (“spot cleaning” and “home”) until you hear the resetting wifi prompt.
From here I just followed the Valetudo Roborock FEL rooting and install guide without any changes.
Post-install info
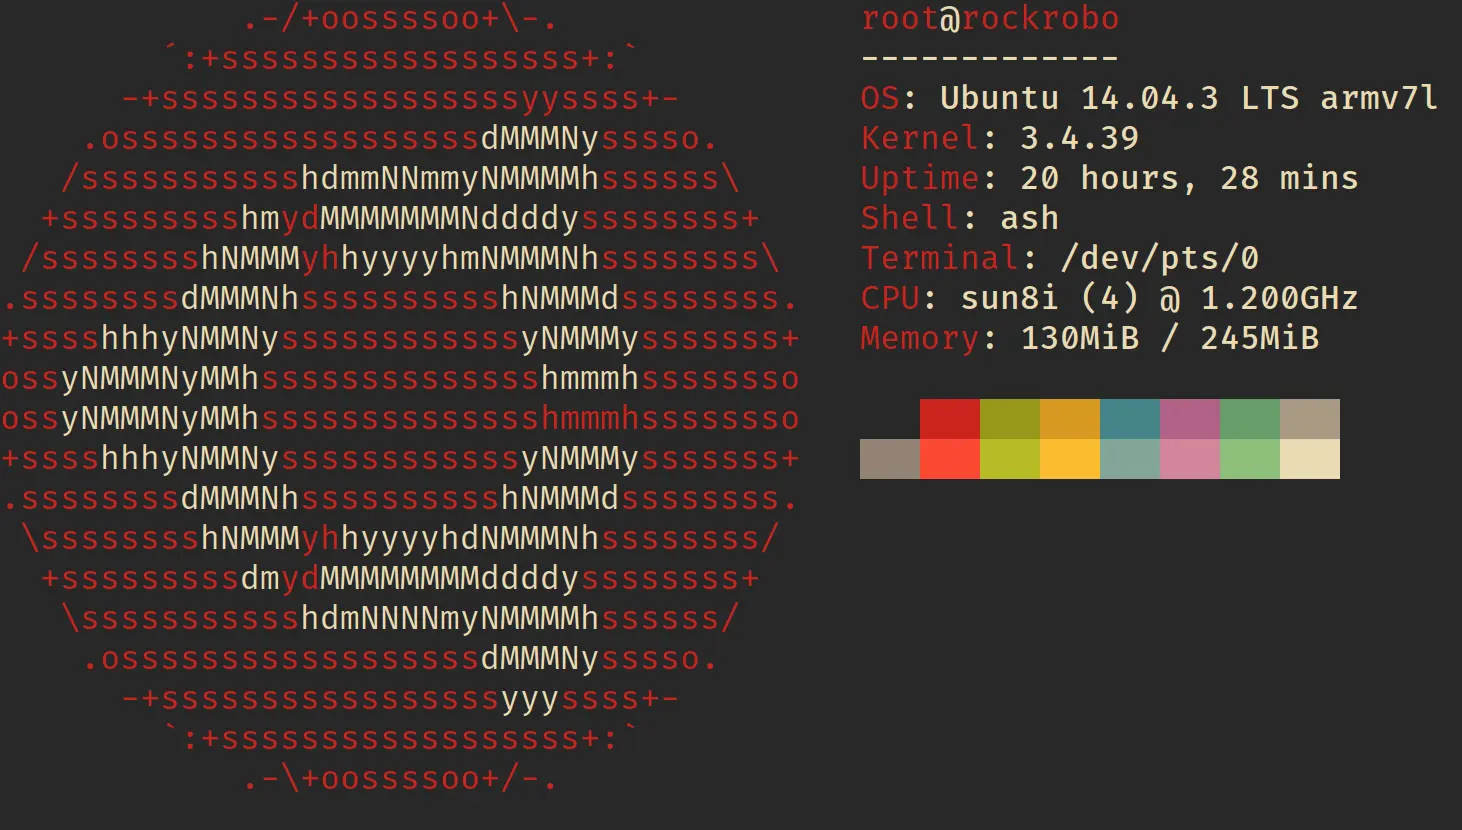
System info. Given that Linux 3.4 was released on May 20th 2012, it was obsolete long before this vacuum became available, yikes!
State of the filesystem:
Approximately 120MB of free space left, could fit something fun in here!
RAM, approximately 90MB left after excluding cache:
Listening server sockets:
)
Binaries:
[
It’s worth noting there’s no package manager, which to be honest I wouldn’t expect in a consumer-grade commercial device.
All in all, the process was fairly straightforward. Nevertheless, I wouldn’t recommend it to beginners, both in regard to hardware, and the software side of things. I was surprised to see a 4-core ARM chip inside of a robot vacuum. It’s basically a low-memory single board computer. If it had more RAM, I’d make it into a Kubernetes node, just for shits and giggles.
To conclude, here’s some neofetch eye candy 😋: